Drawing Tools
Open Drawing Tools from the map viewer taskbar (the globe-with-pencil icon) to add points, labels, lines, and polygons to the map, then search parcels within any shape you draw.
Everything you draw lives inside a project. Create one first, then add and style features on it.
How do I create and manage a drawing project?
- Open the Drawing Tools toolbar (globe + pencil icon).
- Click Manage Projects → right-click the Personal or Group folder → Add Project.
- Type a name and press Enter (or click elsewhere) to confirm it. There is no separate "Done" button in this step. The new project becomes the Active project immediately; no extra click is needed to activate it.
You should now see Active: <your project name> in the Drawing Tools toolbar.
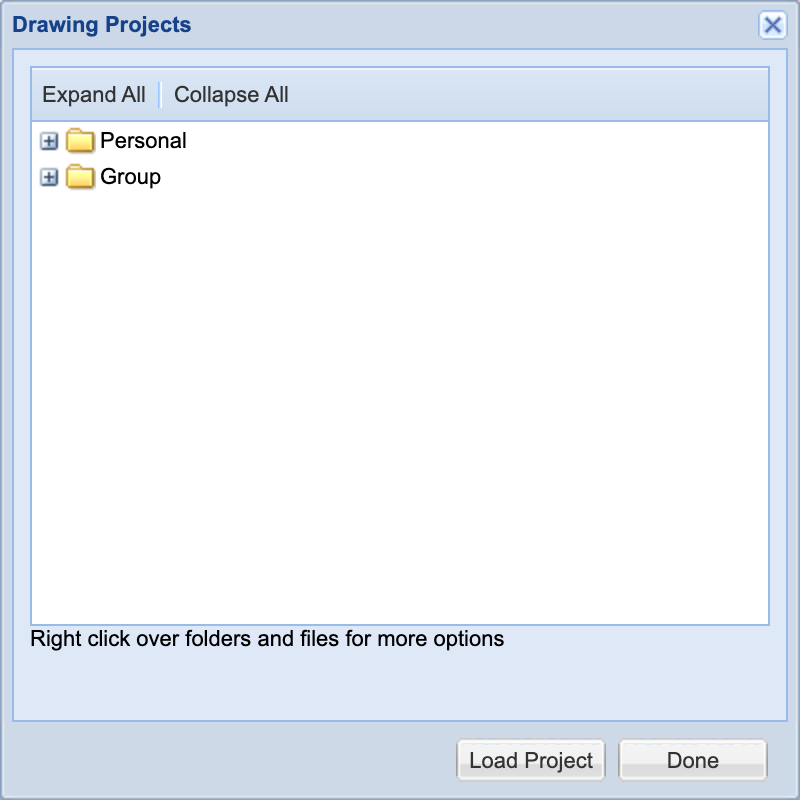
Load, Rename, or Delete a Project
- Load: select a project in the tree, then click the Load Project button at the bottom of the Drawing Projects window. This is a window-level button, not a right-click option, and it only applies to reopening an existing project. A brand-new project is already active as soon as you name it.
- Rename: right-click a project → Rename Project; enter a new name.
- Delete: right-click a project → Delete Project; confirm the "Are you sure?" prompt to remove it permanently.
How do I add points, labels, lines, and polygons to the map?
The four drawing buttons are icon-only. Hover any of them to see its tooltip. In order on the toolbar:

- Draw Point: "Draw Point - Click on map to draw a point."
- Draw Label: "Draw Label - Click on map to draw a label."
- Add Lines: "Add Lines - Click on map to draw a line, double-click to end line." (the tooltip says Lines, plural, even though it draws one line per click-sequence)
- Add Polygons: "Add Polygons - Click on map to draw a polygon, double-click to end polygon." (tooltip is plural here too)
Click a feature button, then click on the map to place it. Lines and polygons need a double-click to finish the shape.
How do I style a point, label, line, or polygon I've drawn?
Left-click any feature you've placed (not right-click) to open its style window. If a drawing tool is still active, clicking the map adds a new feature instead of selecting one: deselect the active tool first, then click the feature you want to edit. The fields depend on the feature type:
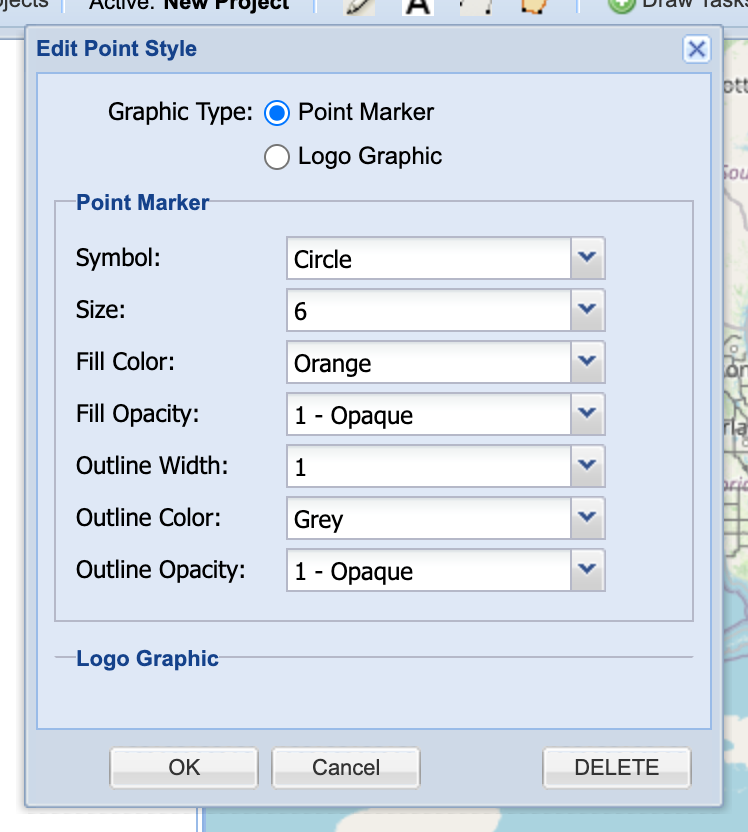
 Point: Symbol, Size, Fill Color, Fill Opacity, Outline Width, Outline Color, Outline Opacity.
 Label: Font Color, Font Family, Font Opacity, Font Size, Font Weight.
 Line: Line Width, Line Color, Line Opacity.
 Polygon: Fill Color, Fill Opacity, Outline Width, Outline Color, Outline Opacity.
A point can also be swapped to a Logo Graphic instead of a symbol. See Upload Custom Logos for that flow.
What's on the Draw Tasks menu?
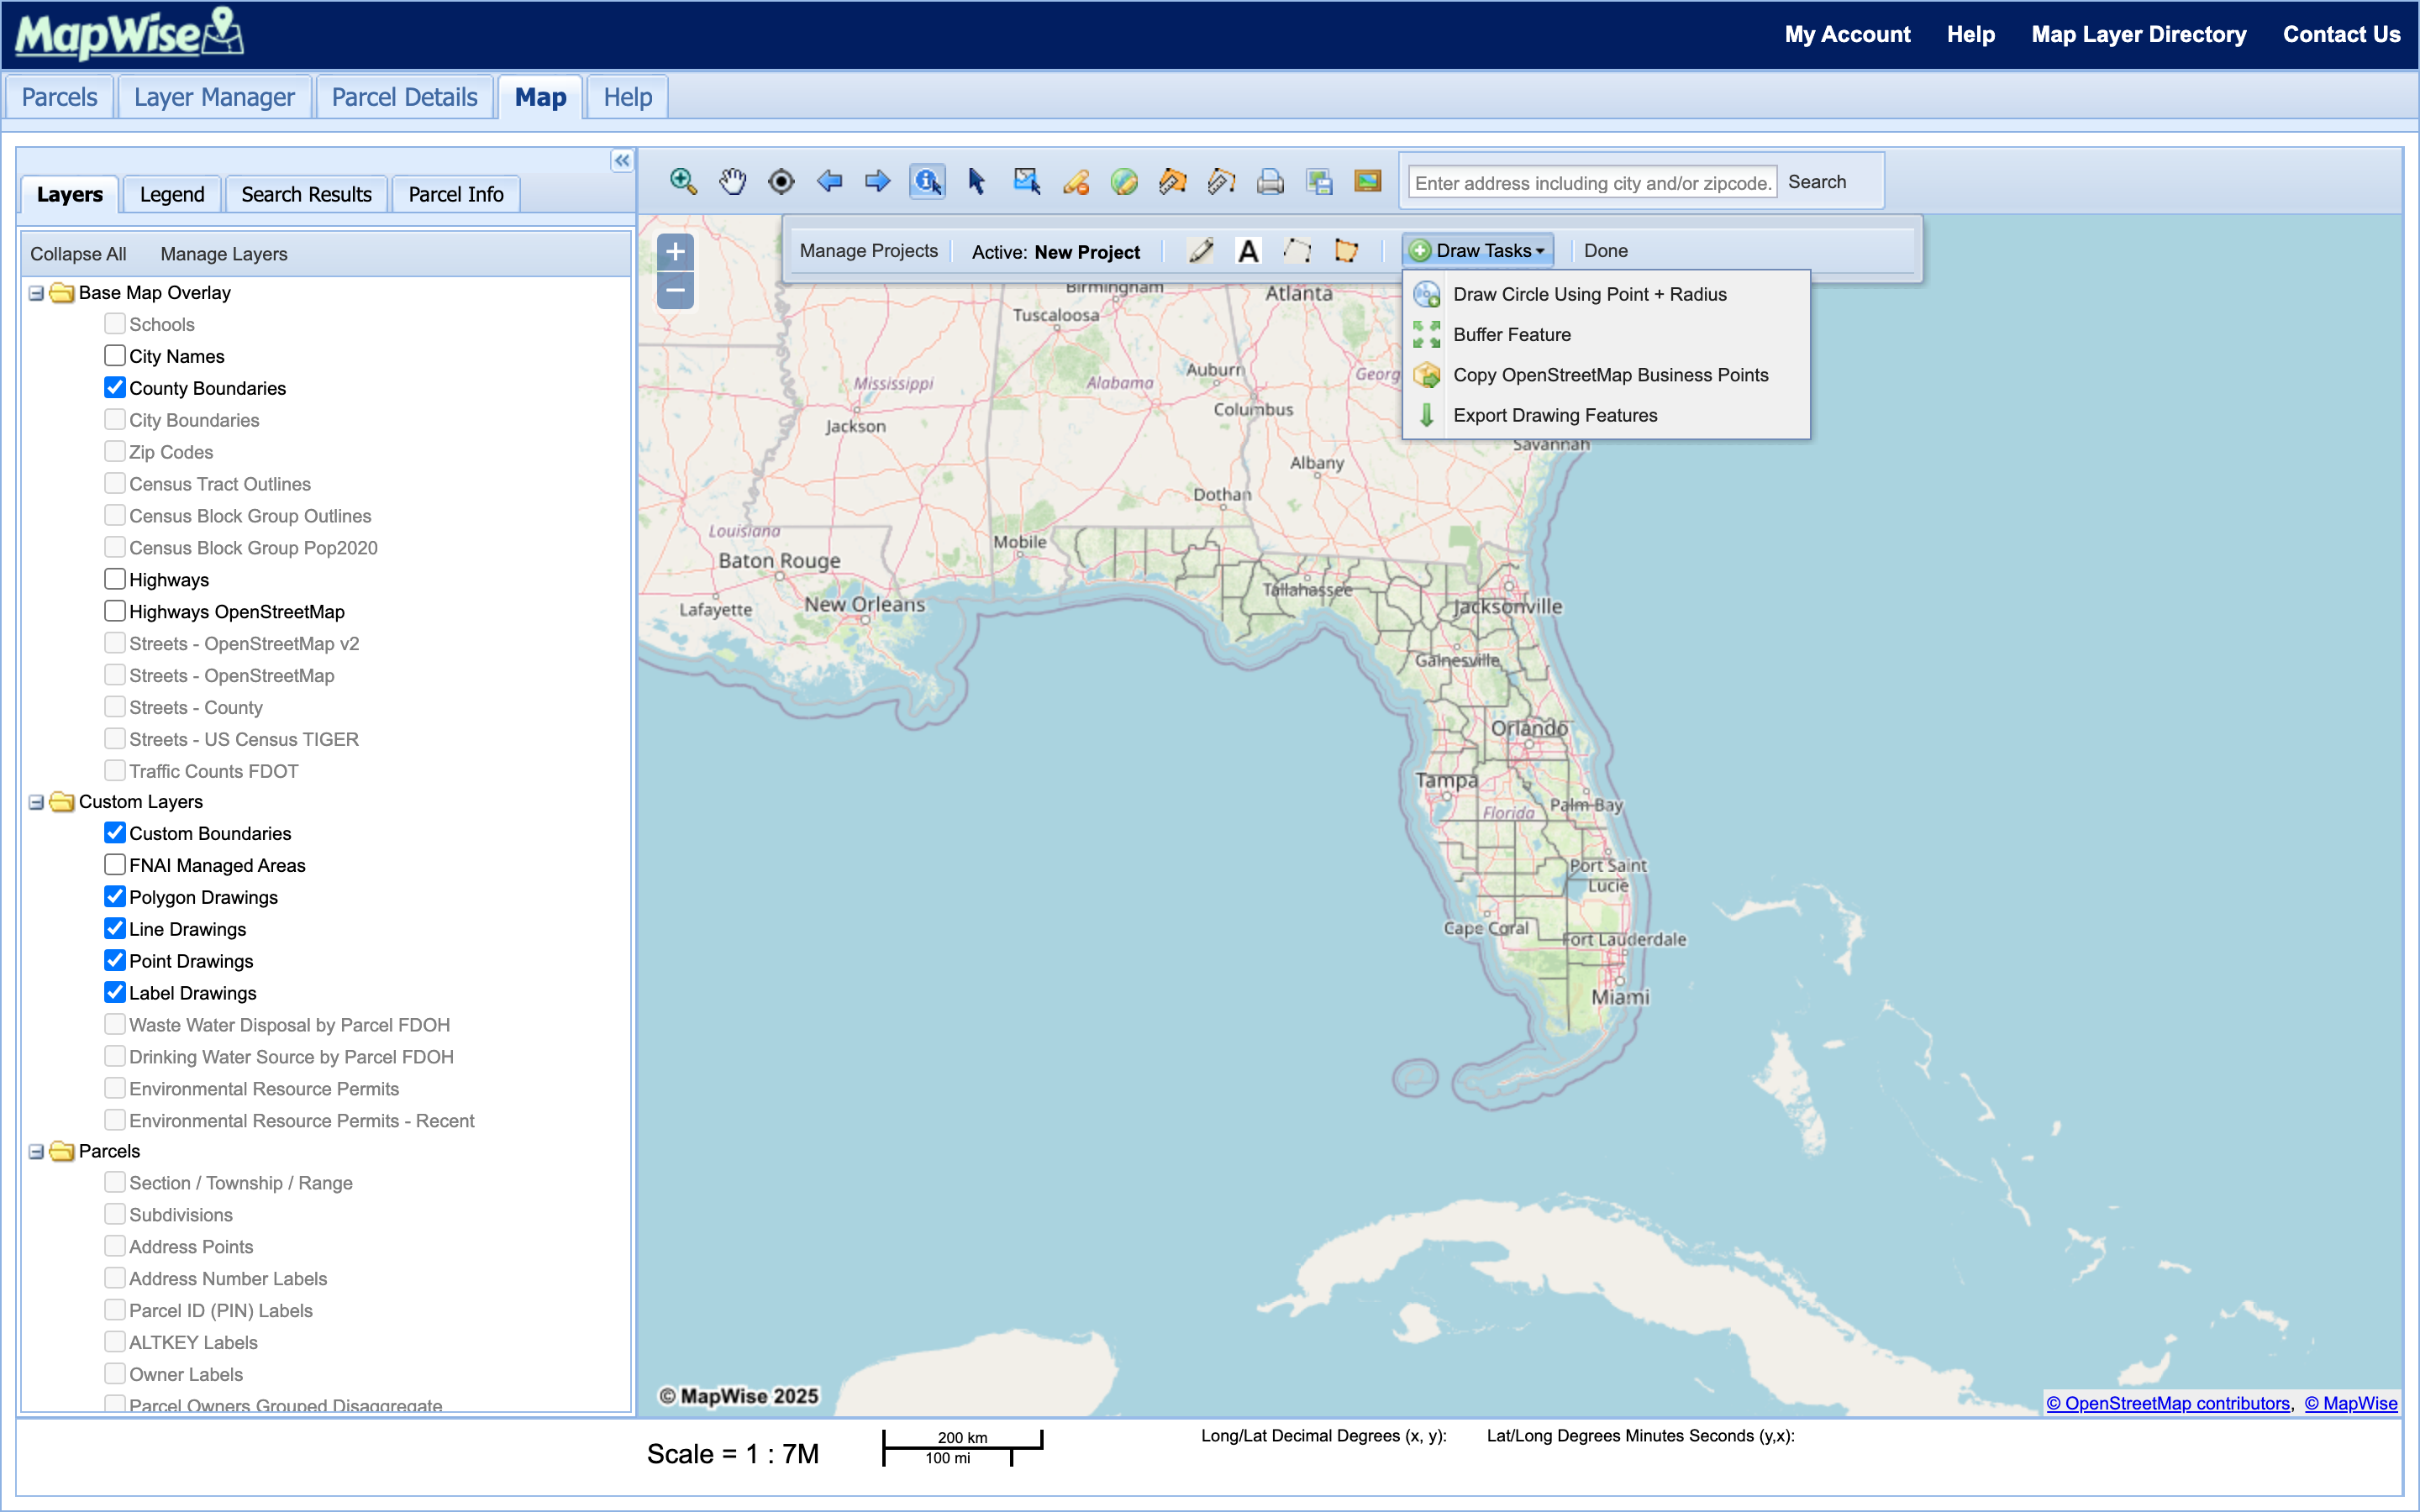
The Draw Tasks button in the Drawing Tools toolbar opens a menu with four options:
- Draw Circle Using Point + Radius: draws and saves a circle into the active project as a polygon. This does not search parcels by itself.
- Buffer Feature: creates a buffer around a selected drawing feature.
- Copy OpenStreetMap Business Points: copies OpenStreetMap business point data into the active project.
- Export Drawing Features: exports the active project's drawn features.
How do I search parcels within a shape I've drawn?
- Draw a polygon (or use Draw Circle Using Point + Radius from Draw Tasks) on an Active project. It must be saved and active, since the search step needs a real project to search against.
- Open Parcel Search and check Search within Drawing Polygons.
- Set your other criteria (owner, acreage, land use, and so on) and click Search Parcels.
You should now see matching parcels highlighted on the map and listed in the results grid.
This is a different mechanism from Custom Boundaries' Select by Radius tool, which searches parcels immediately with no drawing project involved. The two radius tools look similar but don't share a workflow.
Ready to Get Started?
Select a plan, schedule a personalized demo, or contact our support team.