Custom Boundaries
Select parcels on the map, add them to Custom Boundaries, and MapWise merges them into one trackable record with a name, category, and notes, useful for tracking acquisitions, site assemblages, or any group of parcels you want to follow over time.
This page covers creating a new boundary. See Manage Boundaries for editing an existing one.
How do I select parcels for a custom boundary?
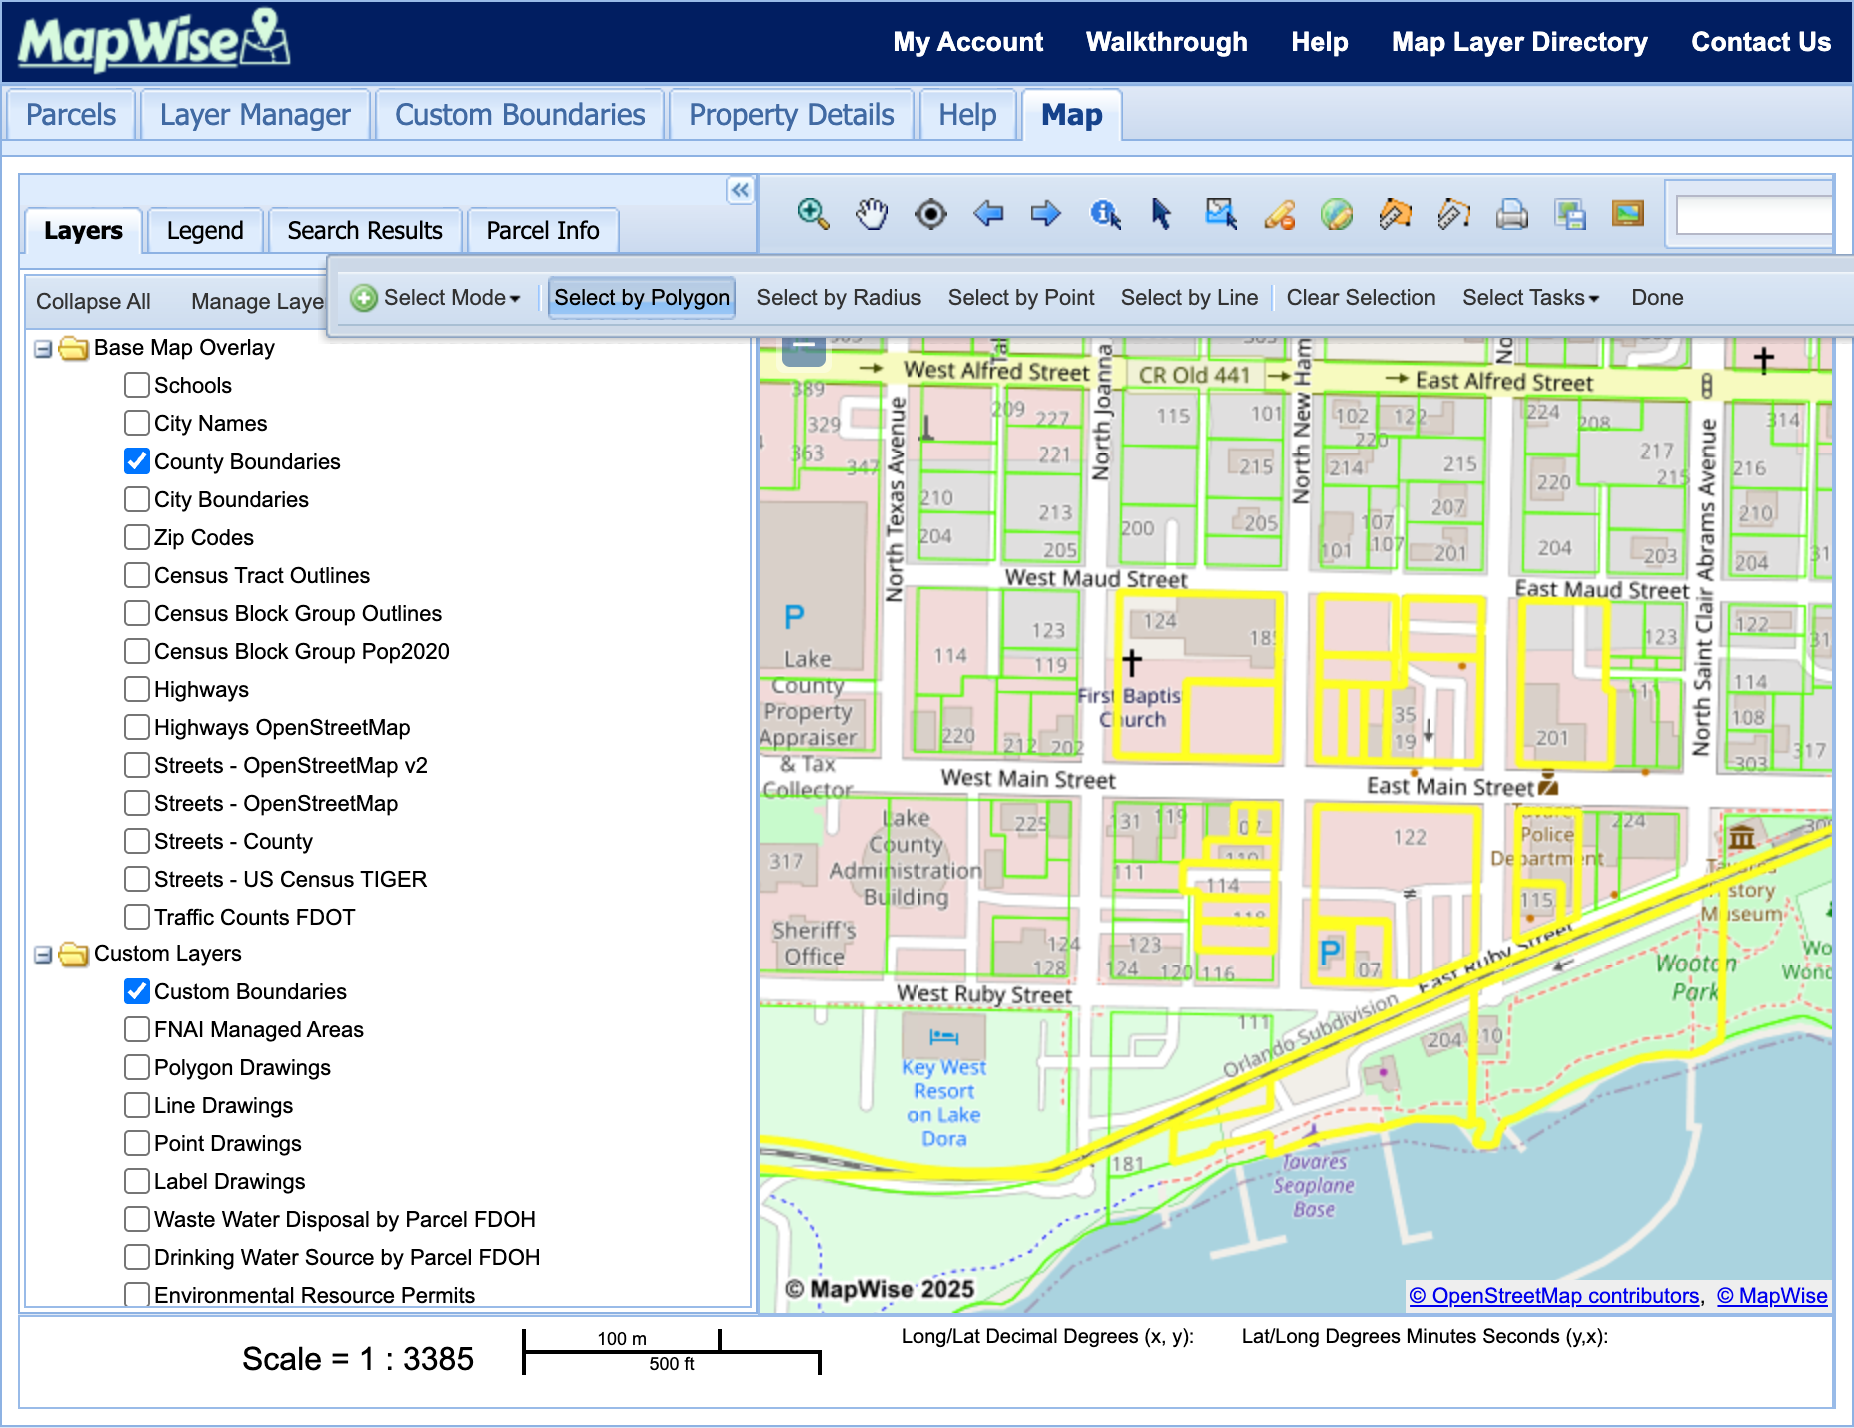
- Click Select Parcels on the taskbar to open the selection toolbar.
- Choose a selection method:
- Select by Point: "Select parcels by clicking on the map."
- Select by Polygon: "Select parcels by clicking on the map to create a selection area polygon, double-click to end."
- Select by Radius: "Select parcels by clicking on the map to create a selection area by radius, double-click to end."
- Select by Line: "Select parcels by drawing a line. Single click to start and create line vertices. Double-click to end."
- Selected parcels highlight in yellow as you click them.
You should now see your chosen parcels highlighted on the map.

How do I add selected parcels to Custom Boundaries?
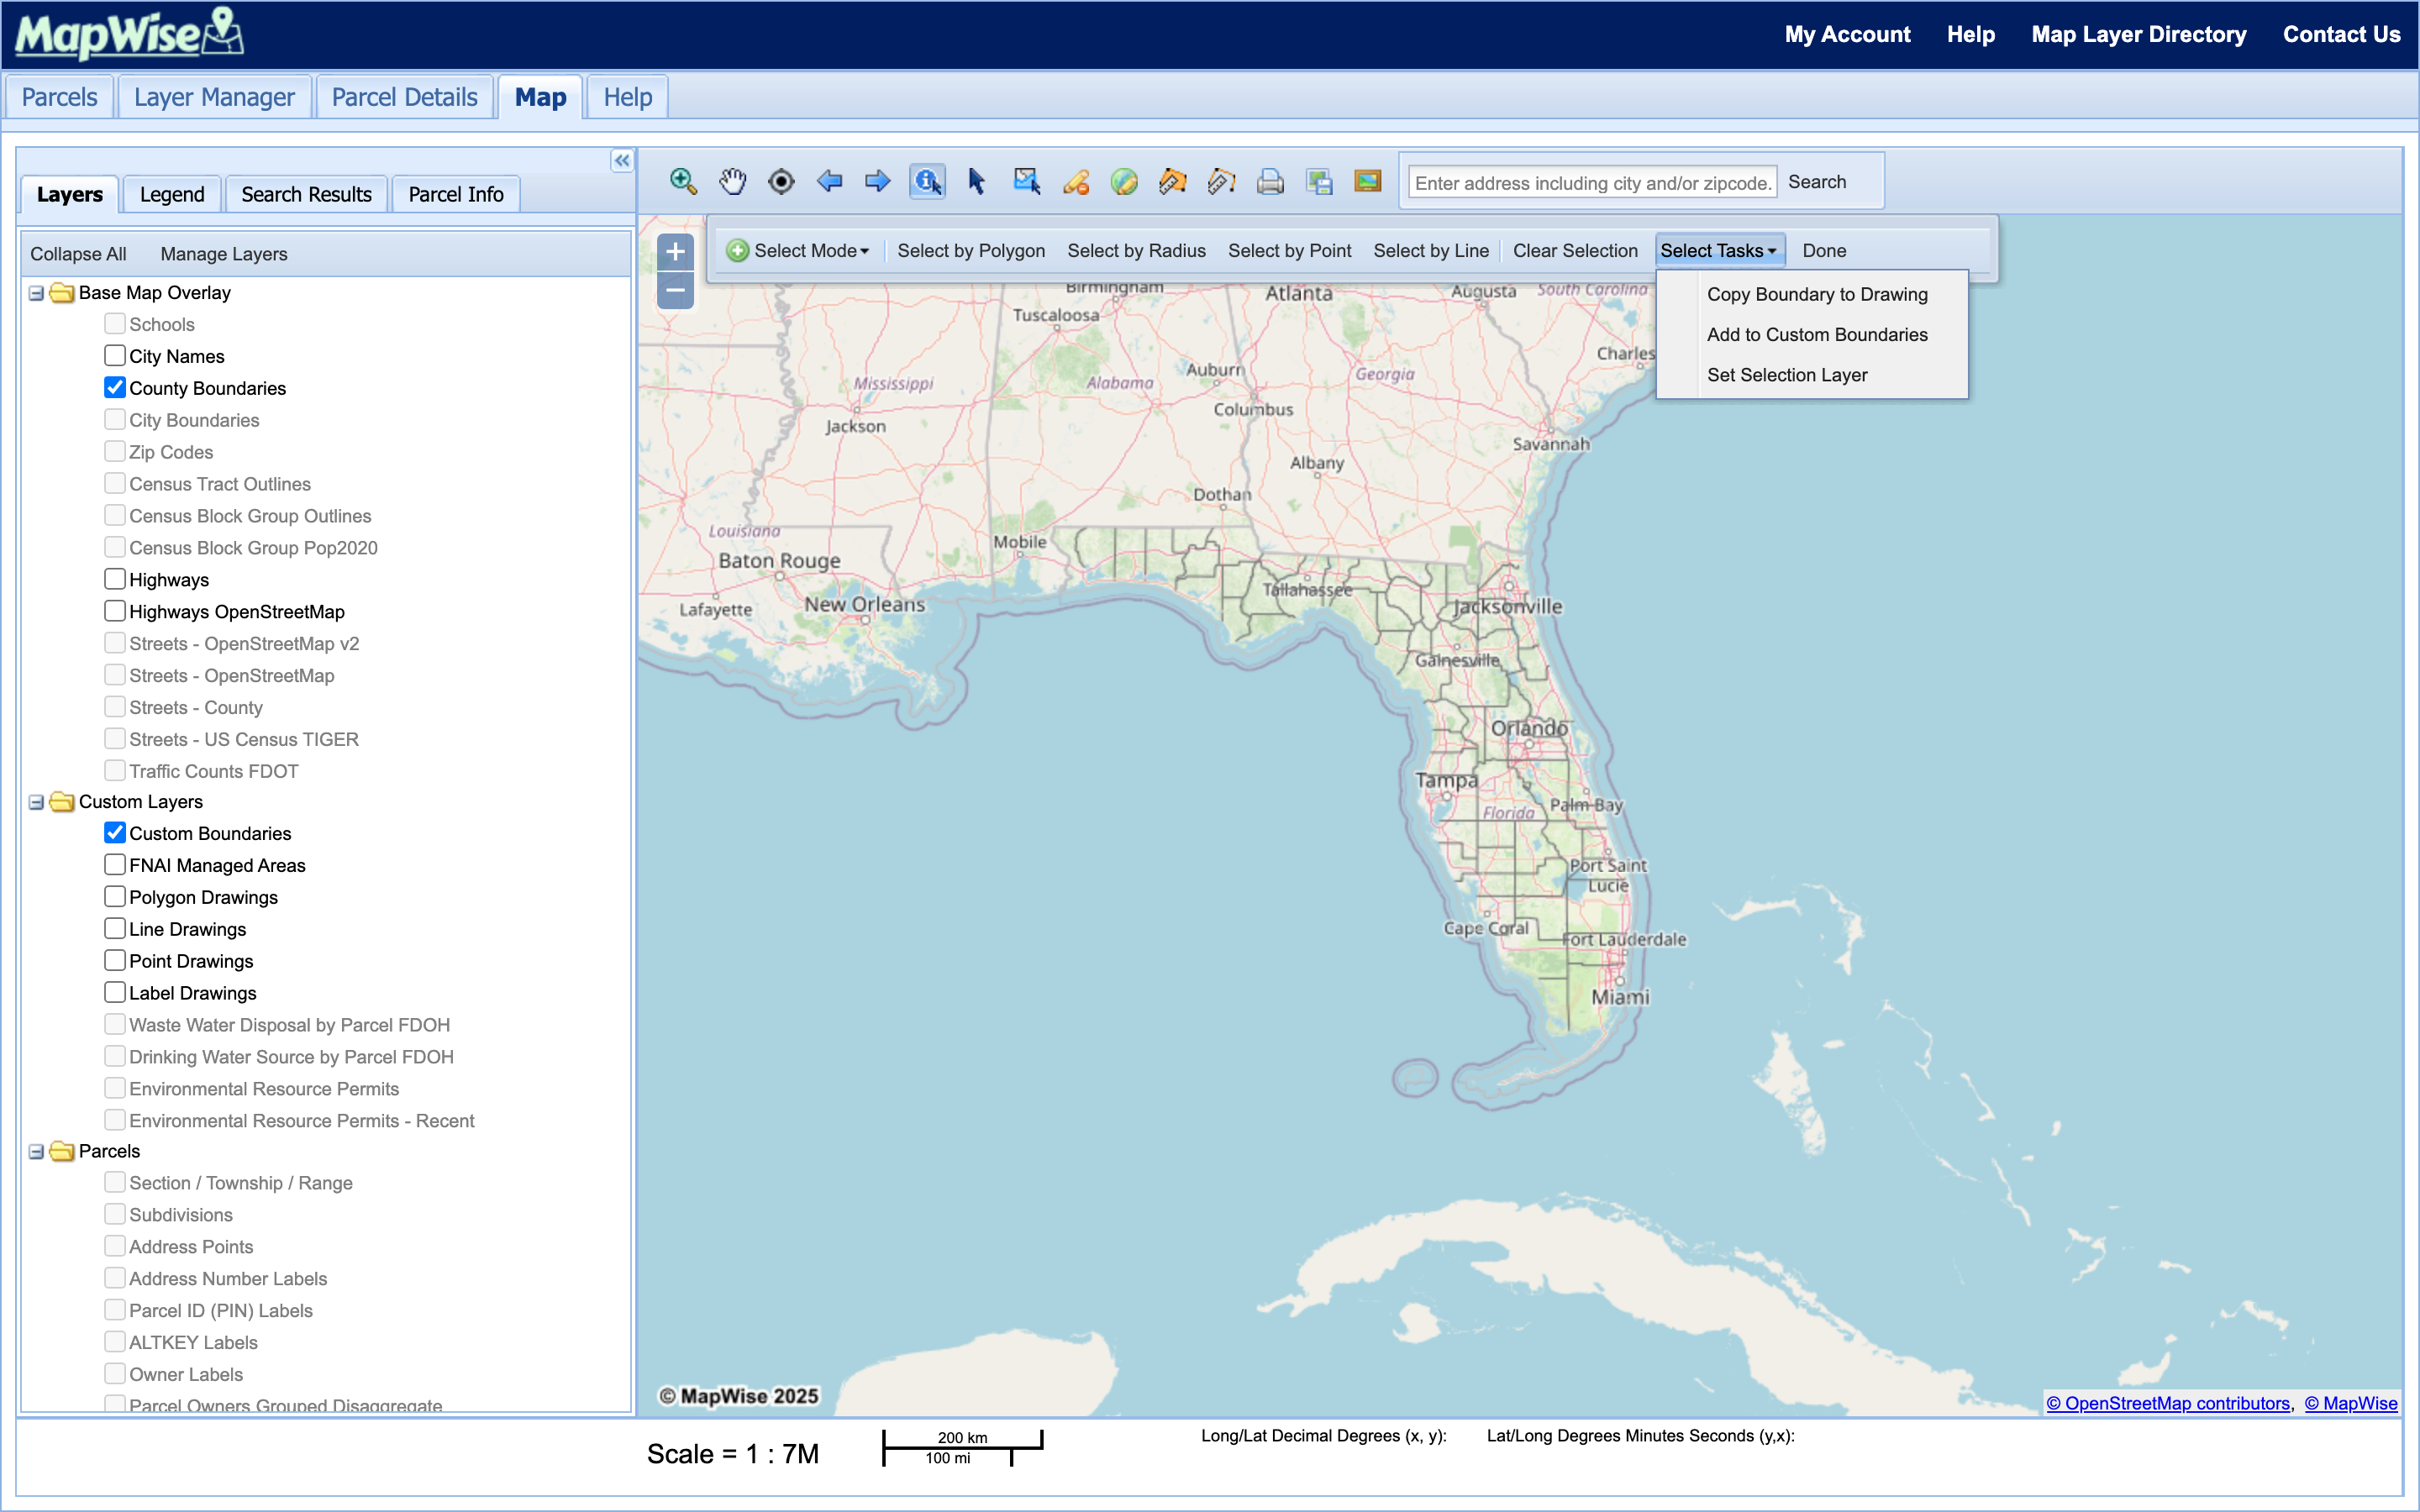
- With parcels selected, click Select Tasks on the selection toolbar. The menu lists two fixed items (Copy Boundary to Drawing and Set Selection Layer) plus an Add to entry for each custom table your account can access; on a default account, that's Add to Custom Boundaries.
- Choose Add to Custom Boundaries.
- Leave Dissolve Parcels checked (it's checked by default) to merge the selected parcels into one unified boundary shape. If you select more than 20 parcels with it unchecked, MapWise warns that dissolving is recommended before you continue.
- Click OK to proceed to the boundary information form.
You should now see the boundary information form, ready to name and categorize the new boundary.
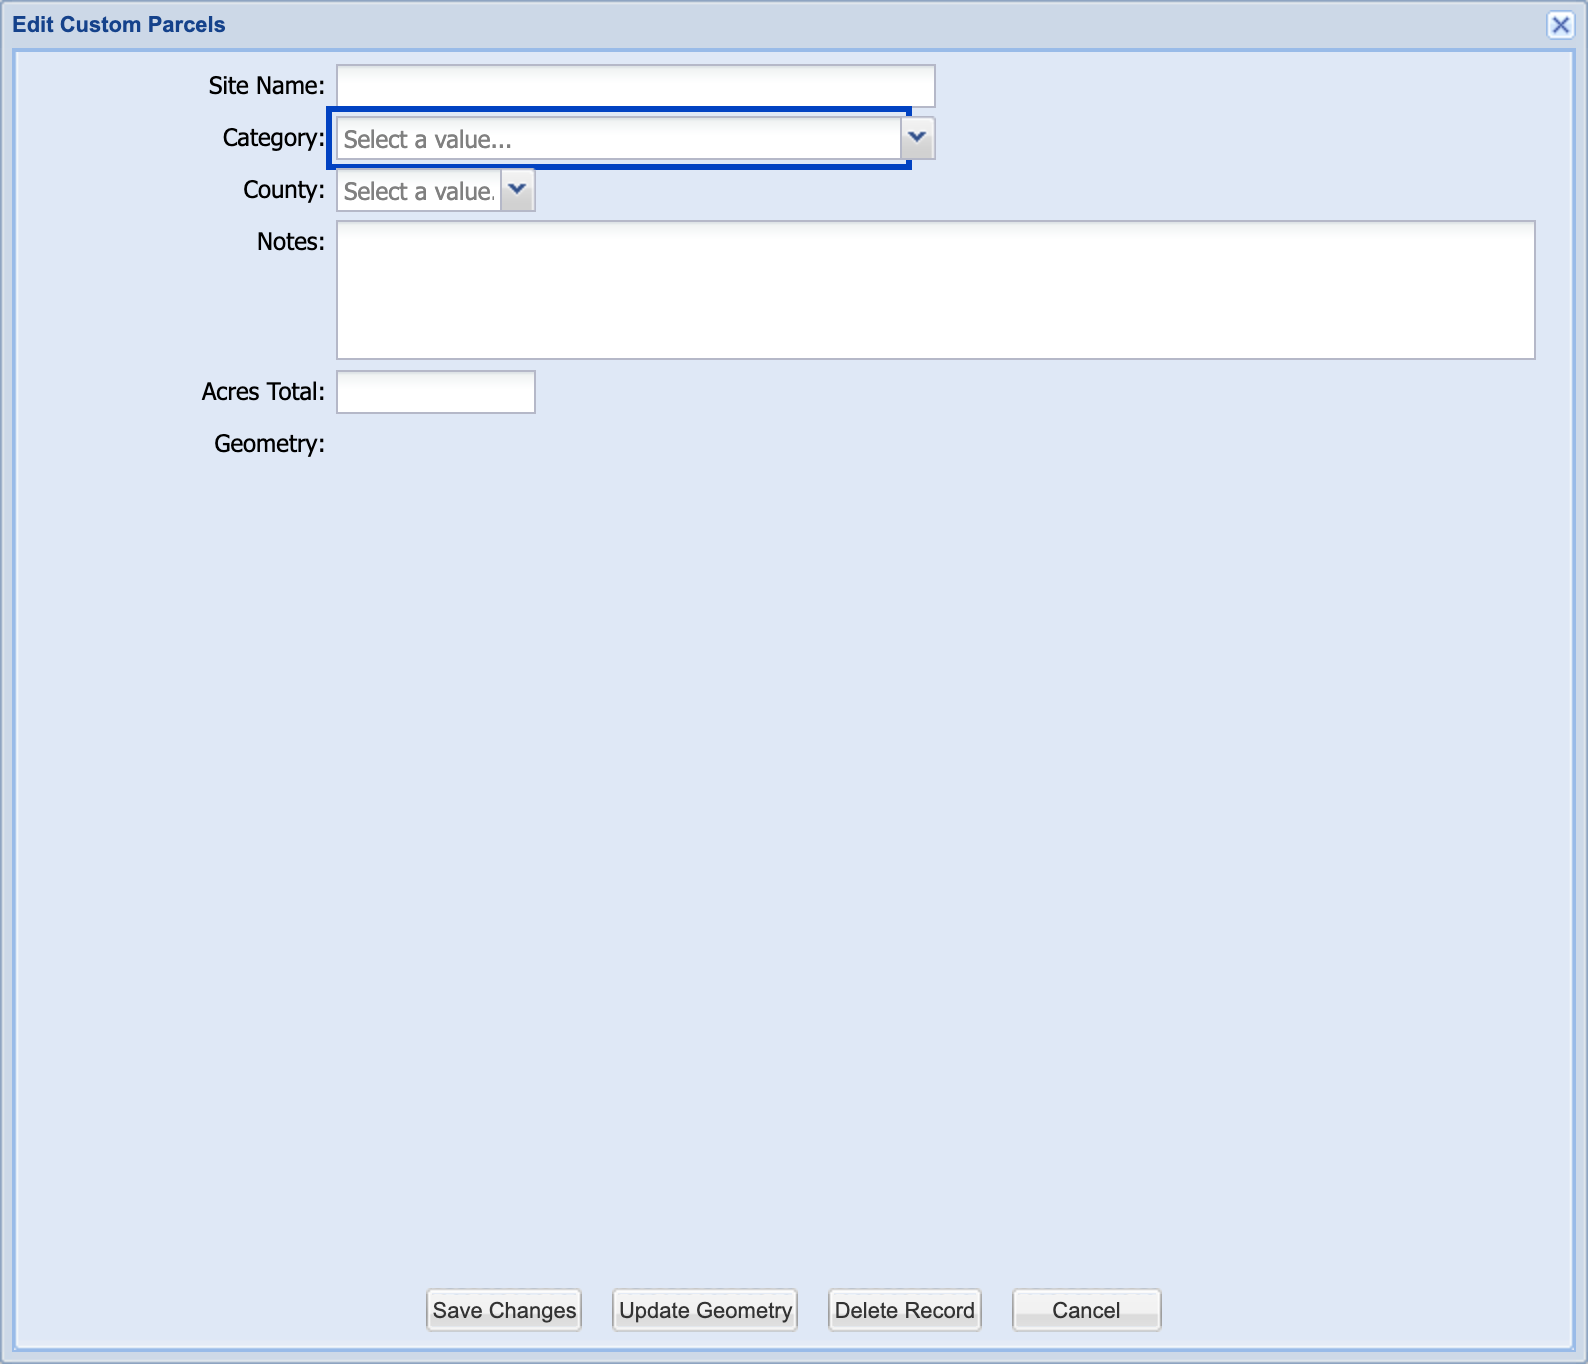
What information do I enter for a new boundary?
- Site Name: a descriptive name for the boundary.
- Category: one of nine fixed values: Sales Comp, Listing, Potential Listing, Potential Acquisition, Favorite, Assemblage, Project, Other, Dead Deal.
- County: auto-populated from the selected parcels' location.
- Notes: free-text notes, e.g. "needs follow-up" or project details.
- Acres Total: calculated automatically from the selected parcels when you create the boundary, but it's an editable field. You can change it afterward.
Click Save Changes to create the boundary.
How do I see my existing custom boundaries on the map?
- Open the Layers panel on the left.
- Check Custom Boundaries under Custom Layers to turn the layer on.
- Zoom or pan to see your saved boundaries render on the map.
You should now see your existing boundaries on the map. To edit one, update its geometry, or manage the full list, see Manage Boundaries.
Ready to Get Started?
Select a plan, schedule a personalized demo, or contact our support team.